
Set up the mount. You will need to find a flat surface with good “elevation.” Find the latitude of your position. There are various online tools you can use to find the latitude of your address. Adjust the latitude of the mount using the latitude adjustment knobs. Orient the mount and adjust the latitude again. You will be set.
Equatorial mounts are great for astrophotography, but there is more to setting up an equatorial mount than attaching the telescope. Follow these steps to ensure you don’t miss any important details when assembling your new mount in the Southern Hemisphere.
Why Do You Need Polar Alignment of an Equatorial Mount?
There are various reasons you need to align your equatorial mount in the Southern Hemisphere:
The Earth is Constantly Rotating
To follow the motion of stars in an hour-based grid, you need to be able to match your telescope’s motions with those of the Earth.
If you don’t have accurate polar alignment, then following celestial objects will be very difficult because any errors are compounded as time goes on. Also, the objects you want to view will not be stationary because of the Earth’s rotation.
Therefore, you need to have tracking accuracy greater than the rotation rate of the Earth.
You need to target the Southern Celestial Pole.
The Southern Celestial Pole (SCP) is the only point in the sky that doesn’t appear to move (from our perspective). The SCP is the point around which all other stars appear to rotate.
So aligning your equatorial mount to the SCP will allow you to find and track any object in the sky. Also, if you are just starting, it can be easier to locate the SCP than Polaris.
If your telescope’s polar axis is not aligned with Earth’s rotation axis, then there will be a drift error that accumulates as time goes on. If this happens, stars move diagonally in the field of view instead of circularly around the center (SCP).
Polar Alignment Method
There are several different methods to align your equatorial mount with the SCP. There is no one perfect method.
Most techniques will work well in some situations but not others (e.g., when polar alignment corrections need to be applied or how accurately you want your telescope’s tracking accuracy).
Steps to Setting up an Equatorial Mount: Southern Hemisphere
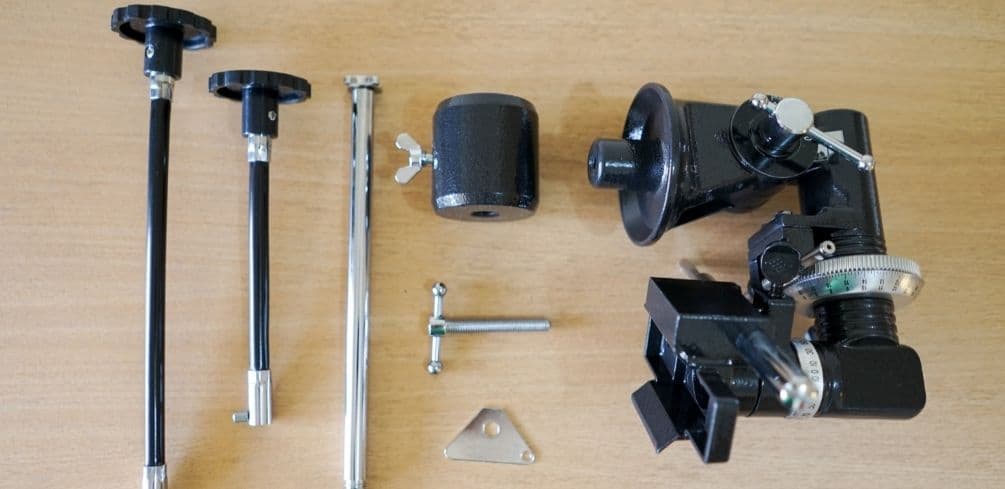
Set Up the Mount
You will need to find a flat surface with good “elevation” (height). Make sure to level the surface using reference points. You might want to use a spirit level to make sure your mount is level and that there aren’t any other surfaces or objects in the way.
Next, attach your tripod and mount your head to this flat spot on the ground or floor by following the manufacturer’s instructions for your equipment.
Find the Latitude of Your Position
There are various tools you can use to find the latitude of your address. This is important because it will tell you the angle of your polar axis in relation to the ground.
So, if you live somewhere south of -40 degrees latitude, then this means that your equatorial mount’s polar axis is pointing up at a negative degree angle from horizontal. If you live north of 40 degrees latitude, it would point upwards at a positive degree angle.
You can use GPS, smartphone apps, or online tools to find your latitude.
Adjust the Latitude of Mount
Now that you know your current location’s latitude, you will need to adjust the mount’s latitude to match that of your current location. How to do this?
Find the Latitude Adjustment Knob on the mount. Unlock the knob; turn the latitude adjustment nuts accordingly until the latitude adjustment pointer points at your current location’s latitude.
The pointer should line up with the degree angle of your polar axis in relation to the ground (negative or positive).
If you are using a wedge, you will need to check if it is level and adjust accordingly. This process might differ depending on what kind of mount you have, so consult your manual if you are unsure.
Orienting the Equatorial Mount
As mentioned earlier, the polar axis of the mount must point at the SCP. The first step is to aim it south or straight above the south horizon.
Don’t worry about it being too high; we’ll take care of that later. Get your compass. Take a few steps back from your tripod and leave it where it is.
Set the compass at around 168°, which will point to the true south rather and not the magnetic south. Now, shift to the left or right so that you may look over the compass and directly south at your tripod.
Now, turn the equatorial mount so that the polar axis is pointing southwards. The ideal scenario is to have someone else rotate it as you direct.
Finally, double-check that the mount is level now. You can use a spirit level, but there is also an iPhone app for it.
A bubble level is usually included in many scopes, which is helpful, but I’ve discovered they aren’t always that precise. Be careful not to turn the mount while leveling it.
The mount’s polar axis should now be pointing due south. But we’re not done yet, as the line between the south horizon and the SCP is only a starting point.
Adjust the altitude (again)
You finished the first stage of the process by pointing it south. We’re now on to the second stage.
Adjust the polar axis’ height so that it is pointing straight at the SCP. Simply put, you must adjust the altitude of the equatorial to match your location’s latitude.
There are two methods to adjust your equatorial mount’s polar axis angle:
The simplest approach is to use the altitude scale, which is built into the tripod. This is enough for most purposes, as long as your mount is extremely level.
Instead of attempting to cut the wax into thin strips with a pair of scissors, use your phone for an easier, more accurate method. Of course, you have to install an app that tells you the angle of inclination.
Make sure your phone is properly leveled by checking it on something that is level. Then, position the phone against a parallel section of the head with your equatorial mount’s polar axis.
To change the altitude:
- Loosen or tighten the latitude adjustment bolts on the mount.
- Make sure you’re not forcing the bolts too much together when fastening them and that one doesn’t come too close to the other.
- When removing one, remember to ease up on the other.
It’s easy to bend the bolts if you’re not careful. If you wind them in one direction, the polar axis rises; if you wind them in the other, it falls.
The Equatorial Mount is all set!
It’s all there now, so you can simply install the telescope on the equatorial mount if it isn’t already there.
Get your target in sight as soon as it gets dark. You should discover that only a turn of the polar axis’ adjuster is required to keep the star in place all night.
The accuracy of the scope’s polar alignment affects how often you need to turn the declination axis.
This is ultimately determined by some variables, including the equipment’s quality and how well you’ve completed the task. However, if you are a visual astronomer, close enough is fine.
Equatorial Mount FAQs
Final Thoughts
Setting up an equatorial mount in the Southern Hemisphere shouldn’t be a difficult task, with the right tools and knowledge. It is important to have a high level of accuracy for visual astronomy, but it is not necessary if you are using the equatorial mount as an astronomical tool only.
Getting your target in sight should be easy once done correctly; all that’s needed after this point would be to install the telescope on the mount itself. If you are new to the world of astronomy, this guide should have given you everything needed to set up your equatorial mount.
Check out more of our guides on Astrophotography. I really think you will enjoy them!
Please be careful and use at your own risk
None of the authors, contributors, administrators, or anyone else connected with StarryNova, in any way whatsoever, can be responsible for your use of the information contained in or linked from these web pages.