
Dew heaters are an essential tool for any astronomer, beginner, or experienced. They prevent dew from condensing on your telescope lens or mirrors, which can ruin your night’s observations.
To correctly use a telescope dew heater, you should first get the right type of heater for your telescope and make sure it is powered correctly. Next, you should adjust the temperature settings according to the weather conditions and check the voltage and temperature readings to ensure they are within the optimal range.
Read on as I dive deeper and show you how to use a dew heater to keep your optics dry and clear. I will also give some tips on how to get the most out of your dew heater to make your astronomical adventures more enjoyable.
So whether you’re new to astronomy or a seasoned veteran, read on to learn about using dew heaters.
What is a Dew Heater?
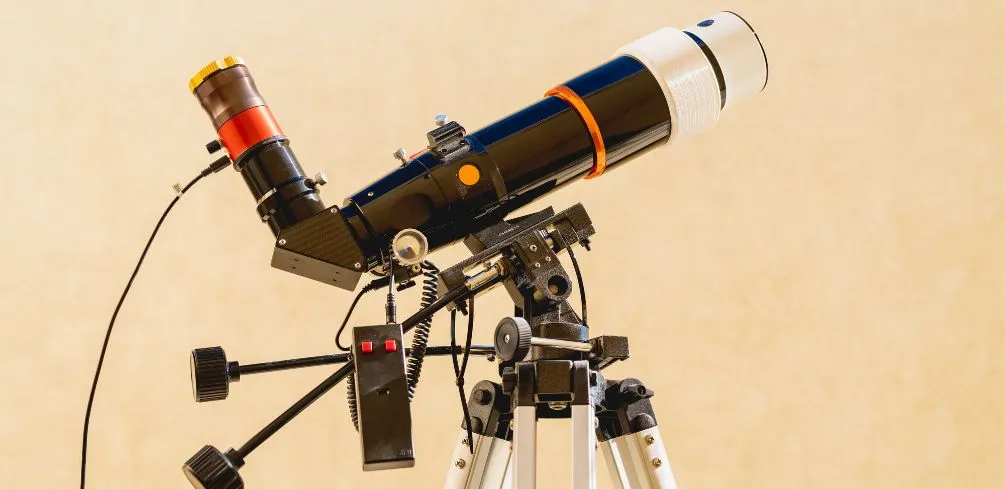
A dew heater is a device that wraps around the outside of your telescope, usually with an adhesive backing. It produces enough heat to keep dew from condensing on your telescope optics.
Dew can form on these surfaces when the temperature of the optics drops below the dew point temperature of the air, which can occur during long exposure observations on humid nights. This can cause the image to become blurry and degrade the quality of the observations.
A dew heater typically consists of a heating element, such as a resistor, that is placed in close proximity to the optical surface and connected to a power source. By applying heat to the surface, the temperature is kept above the dew point, preventing the formation of dew.
Dew heaters are often controlled by a temperature controller, which adjusts the power to the heating element based on the ambient temperature and humidity, to ensure that the optics stay dry. Dew heaters are a valuable accessory for astronomers, as they allow for clear, high-quality observations even under humid conditions.
Quick Tip: A dew heater is simply a nylon ring that has velcro and connects to a power source. The ring goes around the telescope and keeps the lens dry by heating it.
How To Use a Dew Heater Telescope
Here are steps for you to correctly use a dew heater with your telescope:
Get the appropriate dew heater
Making sure you have the proper dew heater for your telescope is the first and most crucial step. Dew heaters come in a variety of sizes and wattages to accommodate different telescope kinds and sizes, so be careful to choose one that is compatible with your optics.
You should take the size and shape of the telescope lens into account before installing the dew heater. Make sure you get a heater that is precisely made for your telescope because one that is too small or large may not be effective.
Attach the dew heater to the telescope lens
Once you have chosen the right dew heater for your telescope, it is time to attach it. Most dew heaters come with an adhesive backing, which makes them easy to install.
Simply peel off the backing and place the heater around the edge of your telescope lens. The heater should be snug but not too tight, as this can prevent it from heating the lens effectively.
Connect the dew heater to a power source
Once your dew heater is attached, you need to connect it to a power source. This is usually done with an extension cord or through direct wiring into your telescope mount, depending on the dew heater you are using.
Make sure to follow the instructions provided with your dew heater for proper setup and connection.
Set the temperature of the dew heater
Now that your dew heater is connected, it’s time to set its temperature. This temperature should be higher than the ambient temperature in order to prevent condensation from forming on the telescope lens. For most dew heaters, this is done by setting a target temperature in the controller.
Make sure to refer to your dew heater’s instructions for exact settings and details.
Once you have set the temperature, leave it running throughout your observing session to keep your optics dry and clear. A temperature of 10-15 degrees above ambient temperature is typically sufficient to prevent dew from forming on the lens.
Keep an eye on the temperature
Keep an eye on how hot the lens and dew heater are to make sure they stay at the right temperature. Turn down the temperature control if the lens is getting too hot, and raise the temperature setting if the lens is getting too cold.
However, some dew heaters have a temperature sensor that may be used to control the heater’s power as well as turn it on and off to maintain a certain temperature.
This is how a dew heater should be used with a telescope. With a dew heater, you may take full advantage of your night sky viewing experience while still enjoying clear, sharp observations even in muggy conditions.
Tips for Effective Use of a Telescope Dew Heater
Here are a few tips for making the most of your dew heater:
- Set up early: You want to turn on the dew heater before dew starts to form on the lens. This will prevent the formation of dew in the first place and make it easier to maintain a clear and fog-free view of the night sky.
- Be aware of temperatures: Monitor both the temperature of the dew heater and its effects on the telescope lens regularly. Too cold, and the dew will form; too hot, and your optics may be damaged.
- Stay vigilant: Look for signs of condensation forming on the lens, such as water droplets or fogging. If you see any of these signs, immediately adjust the temperature setting on your dew heater to prevent further damage.
- Use the right voltage: Different dew heaters require different voltages. Make sure to use the correct voltage for your particular dew heater to prevent it from being damaged.
- Store properly: After use, make sure to store your dew heater in a dry and secure place. This will ensure that it remains in good condition for years to come.
Benefits of Using a Telescope Dew Heater
Dew heaters have a wide range of advantages, such as:
No more moisture and fogging of your optics
Dew heaters can stop dew from building up on your telescope’s lens, ensuring a bright, fog-free vision that will enhance the quality of your observations. Overall, using a dew heater will help you get more out of your observational sessions.
Precise temperature management for crystal-clear, sharp photos
A dew heater can assist in ensuring that the image you see is as clear and sharp as possible by preventing dew from collecting on the lens. The temperature control enables you to select the precise temperature required to prevent dew from forming on your optics.
Extended periods of observation
A dew heater can help in extending the time you spend viewing by reducing condensation. You will have more time to appreciate the glories of the night sky as a result.
Ease of use
Dew heaters are simple to use and come with easy-to-follow setup and use instructions. You will enjoy bright, fog-free views of the night sky by following a few easy procedures.
All things considered, getting a dew warmer is a great way to make the most of your telescope. You will have the best views of the night sky using a dew heater because it will keep your optics dry and clear.
If you want clear photographs and longer observational sessions, make sure you get a good dew heater.
How to Troubleshoot Common Dew Heater Problems
Sometimes, despite your best efforts, you may still encounter problems with your dew heater. Here are some tips on how to troubleshoot the most common issues:
Dew heater not turning on
If your dew heater isn’t turning on, the first thing to check is the power supply. Make sure that it’s plugged in properly and that the circuit breaker hasn’t tripped.
If everything looks good, then try switching out the power plug for a different one to see if that solves the problem.
Temperature setting not working properly
Check that the settings are correct and that you haven’t accidentally switched it into an “off” mode. Also, make sure to check the airflow around the heater to ensure that there isn’t any blockage or interference.
Heater is overheating
If the heater is overheating, reduce the temperature setting and check the wiring for any signs of damage or fraying. If the problem persists, check the voltage to make sure it’s within the recommended range for your heater.
The dew heater is not heating evenly
Make sure it’s properly positioned on the lens. If it’s not, adjust the position to ensure that it covers the entire lens surface.
Consider using multiple heaters to cover larger lenses. You may choose to use heat tape or flexible dew strips to help spread the heat more evenly.
There is interference with other equipment
If you notice your dew heater is causing interference with other equipment, such as your camera or auto guider, try moving the heater to a different location or using a different power source. You can also try using a dew shield to help reduce the interference.
Poor image quality
Still experiencing poor image quality after using a dew heater? Make sure the lens is clean and free of any residue or debris.
Consider using a dew shield to further prevent dew from forming. Be sure to also check the voltage and temperature readings to ensure they are within the optimal range.
How to Use a Telescope Dew Heater: FAQ
Why should I use a dew heater?
A dew heater is a tool that aids in preventing condensation from developing on a telescope’s lens. It accomplishes this by offering perfect temperature control and maintaining dry, clear optics, which improves views of the night sky.
What typical issues do dew heaters often have?
Dew heater issues frequently include failure to switch on, incorrect temperature settings, overheating, uneven heating, interference with other devices, and poor image quality.
Are dew heaters simple to use?
Dew heaters are incredibly simple to set up and run, and they come with clear instructions. You may enjoy bright, fog-free views of the night sky by following a few easy procedures.
Are dew heaters worth it?
Yes, using a dew heater to maximize the performance of your telescope is a great idea. So be sure to purchase one if you want clear photographs and extended observing sessions.
Are there any further techniques to avoid dew accumulating on the lens?
Yes, along with employing a dew heater, you can use a dew shield.
Where can I buy a dew heater?
This product available at most telescope businesses as well as online retailers like Amazon. It’s vital to pick the correct dew heater for you.
So do your homework before making a purchase. There are numerous varieties of dew heaters available.
How much is the dew heater?
Depending on the style and size you choose, a dew heater will cost you a different amount. Make sure to compare prices before making a purchase because the cost also relies on the manufacturer and merchant.
Is a particular power supply required for my dew heater?
No, a specific power source is not required for your dew heater. The majority of models use a standard 12V DC.
Final Thoughts
Telescope dew heaters are an invaluable accessory for any astrophotographer. By keeping your optics dry and clear, they can help you get the best possible images of the night sky. Make sure to research different types of dew heaters, as well as their power sources, before making a purchase to find the right one for you. Once you have your dew heater, you can enjoy longer and clearer viewings of the night sky.
Please be careful and use at your own risk
None of the authors, contributors, administrators, or anyone else connected with StarryNova, in any way whatsoever, can be responsible for your use of the information contained in or linked from these web pages.